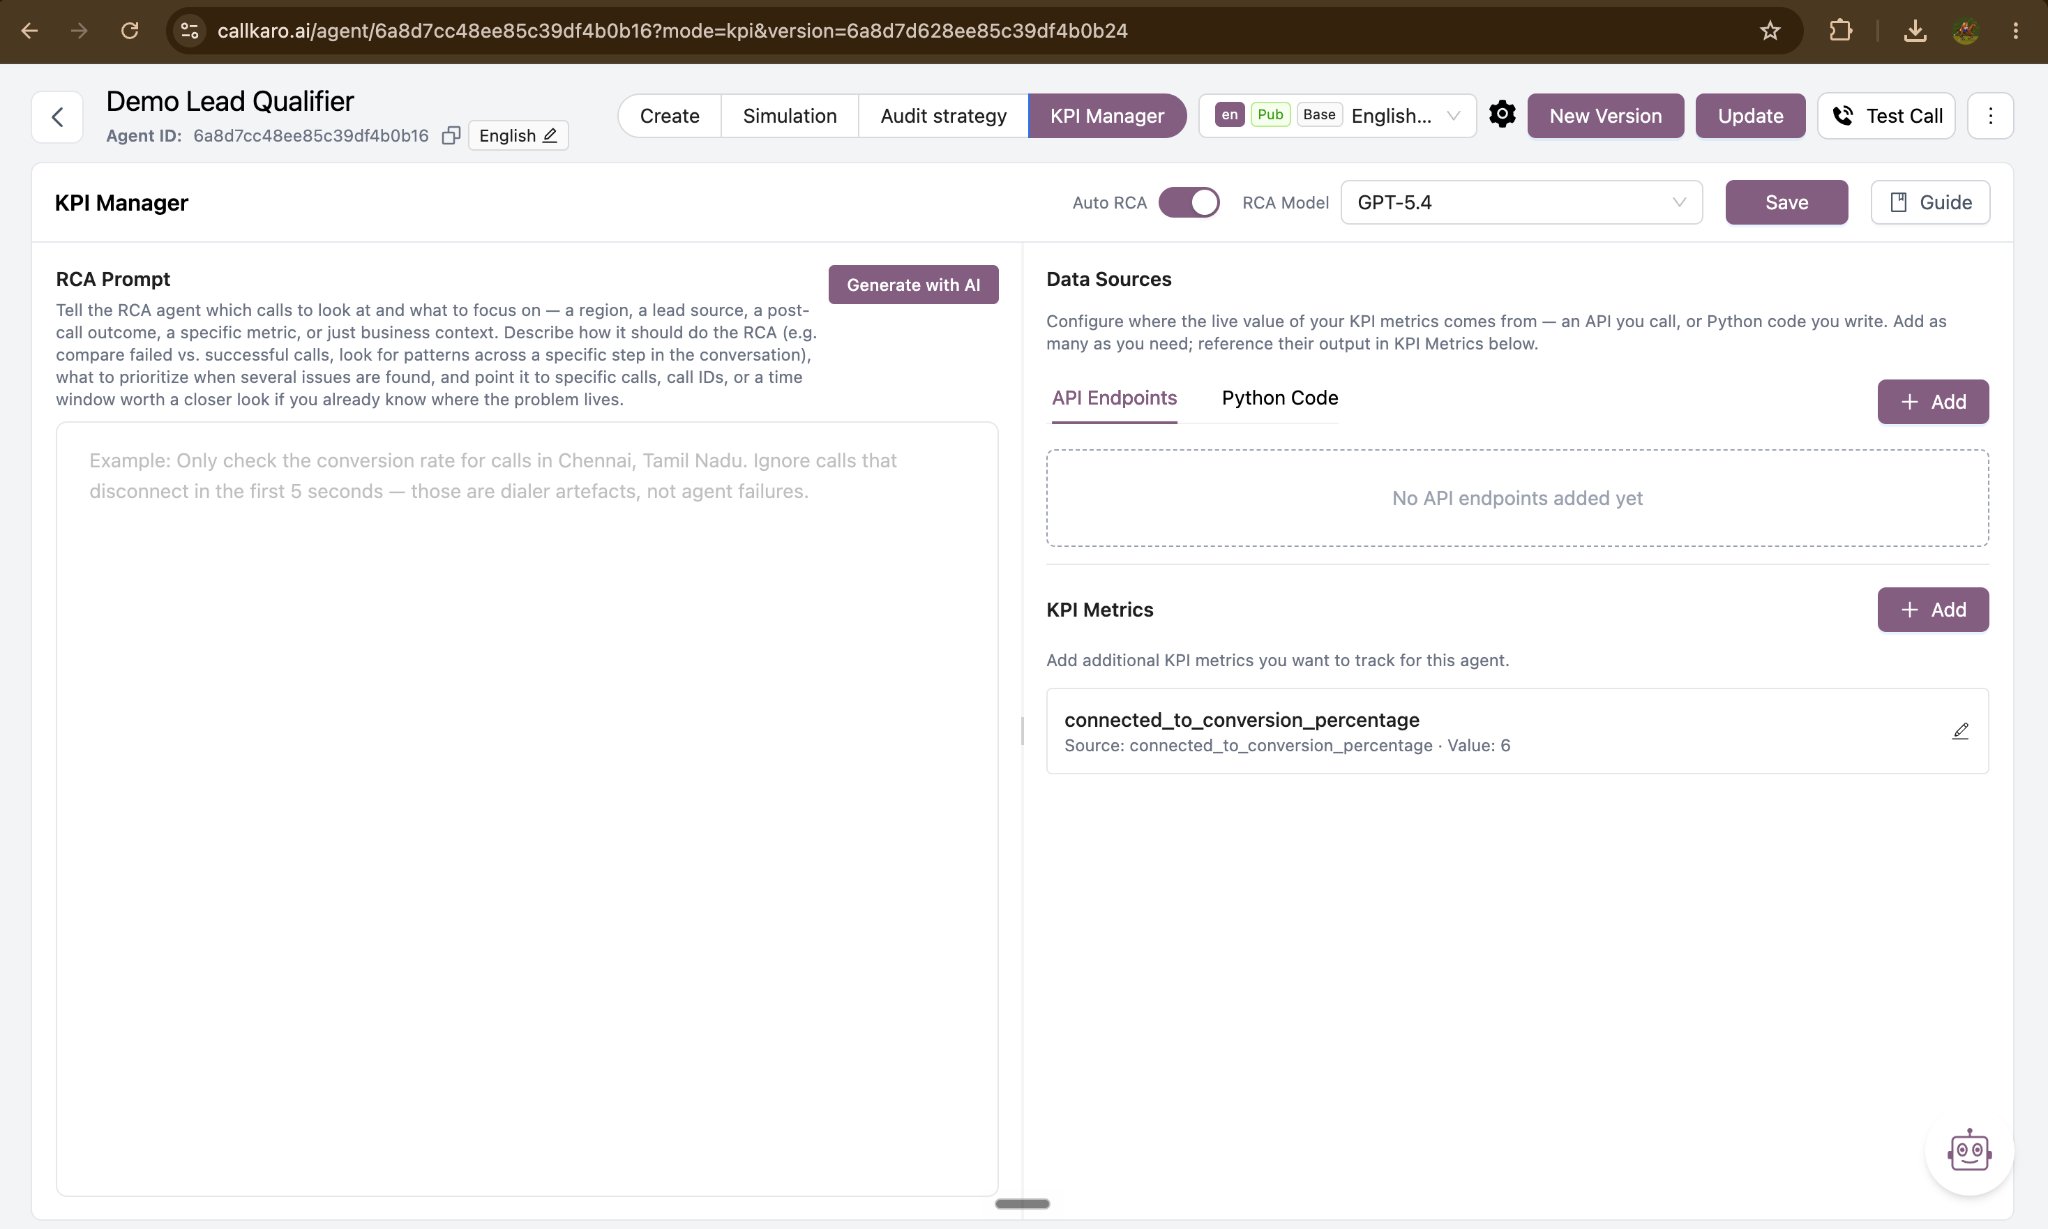
Step 1 — Add a data source
A data source supplies the live value of a metric. Open the Data Sources panel and choose one of the two tabs.- API Endpoint
- Python Code
Use this when the number already exists behind an API in your systems. Callkaro will call it once per batch of calls, sending the phone numbers involved.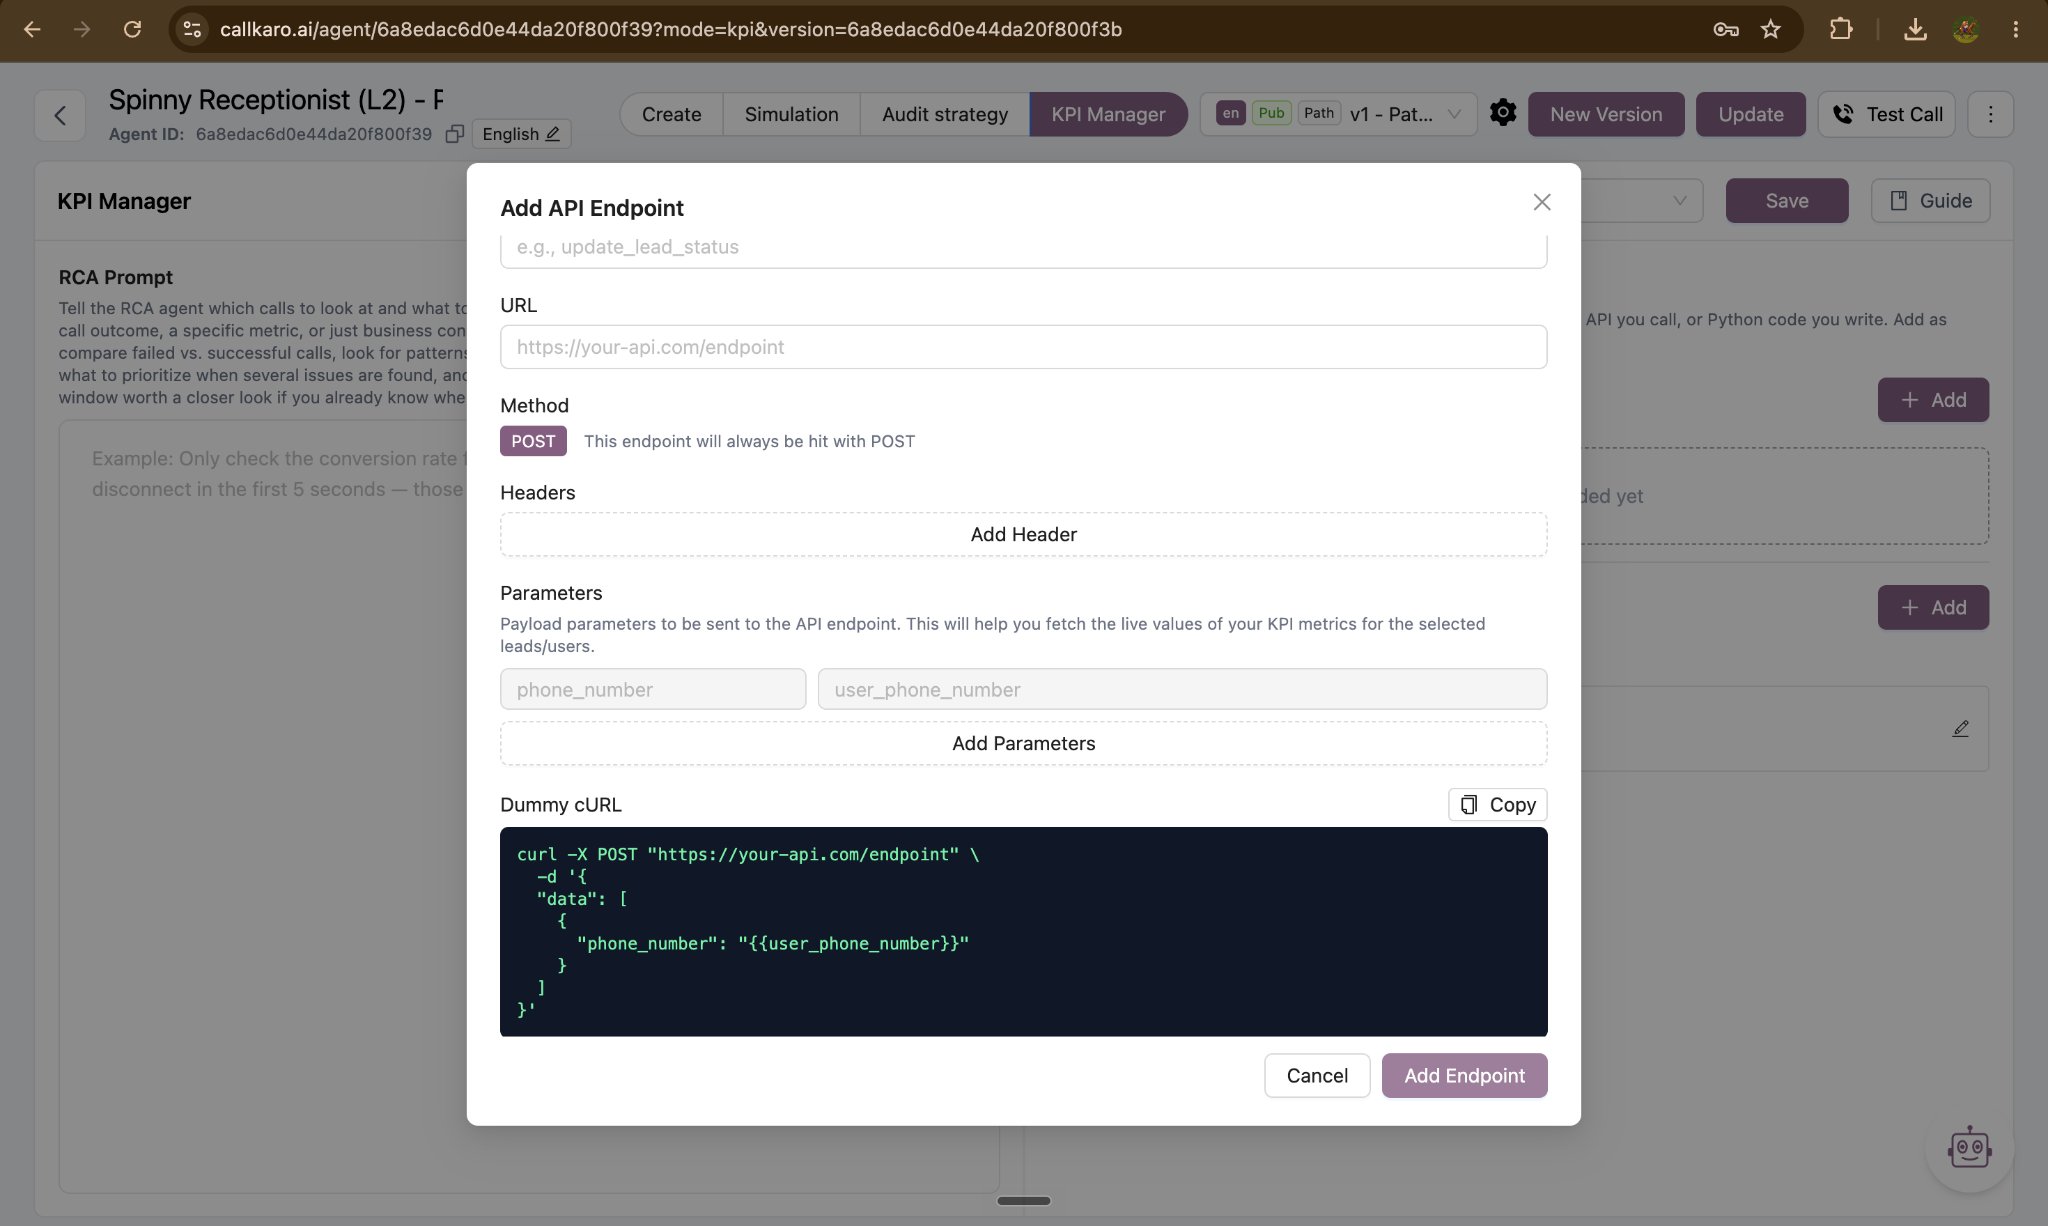
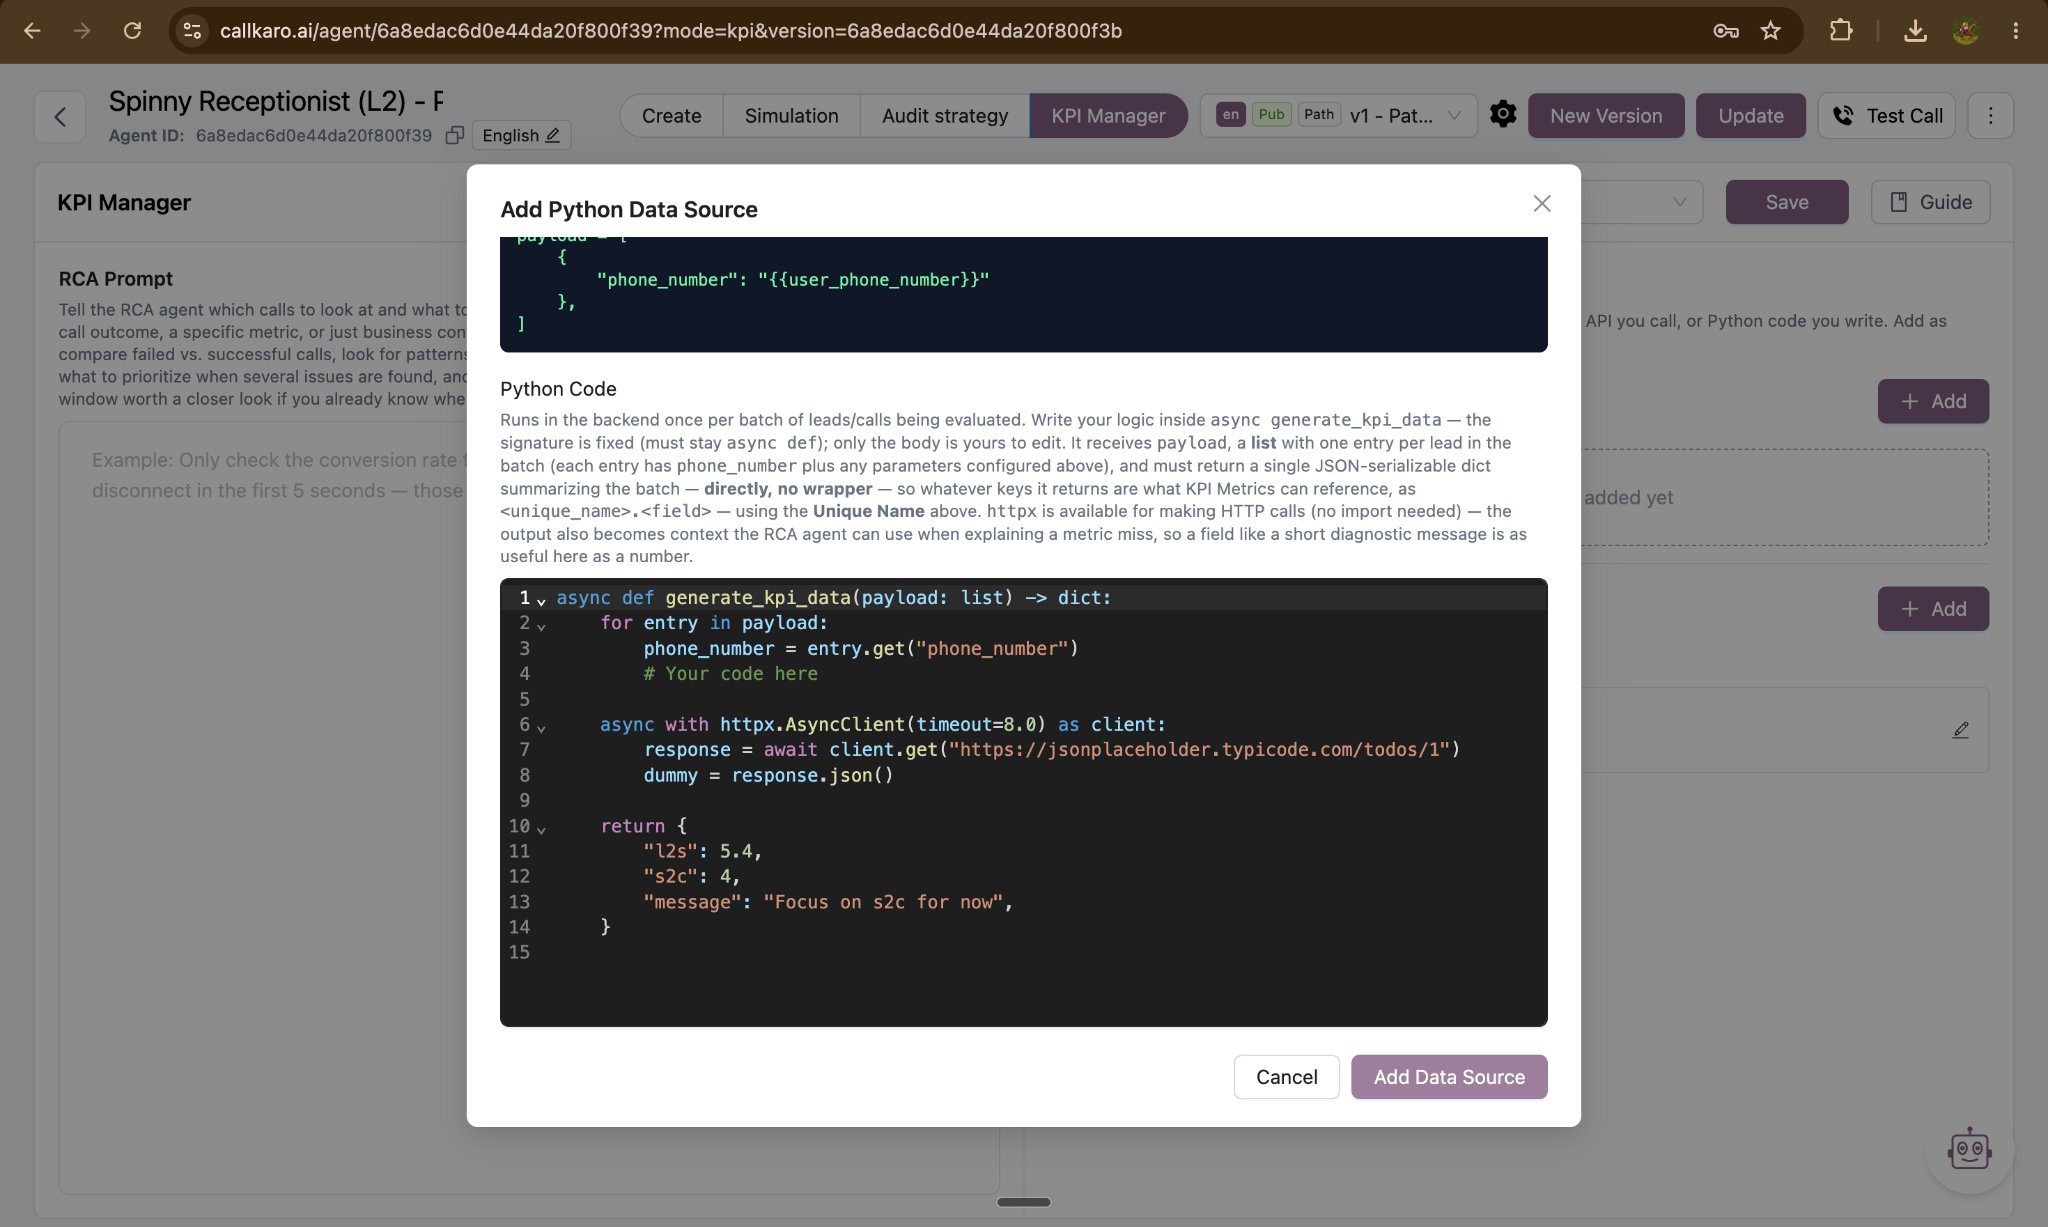
Step 2 — Define your KPI metrics
A metric turns a raw field into a tracked business number with a target. Open KPI Metrics and select Add.How to reference a source
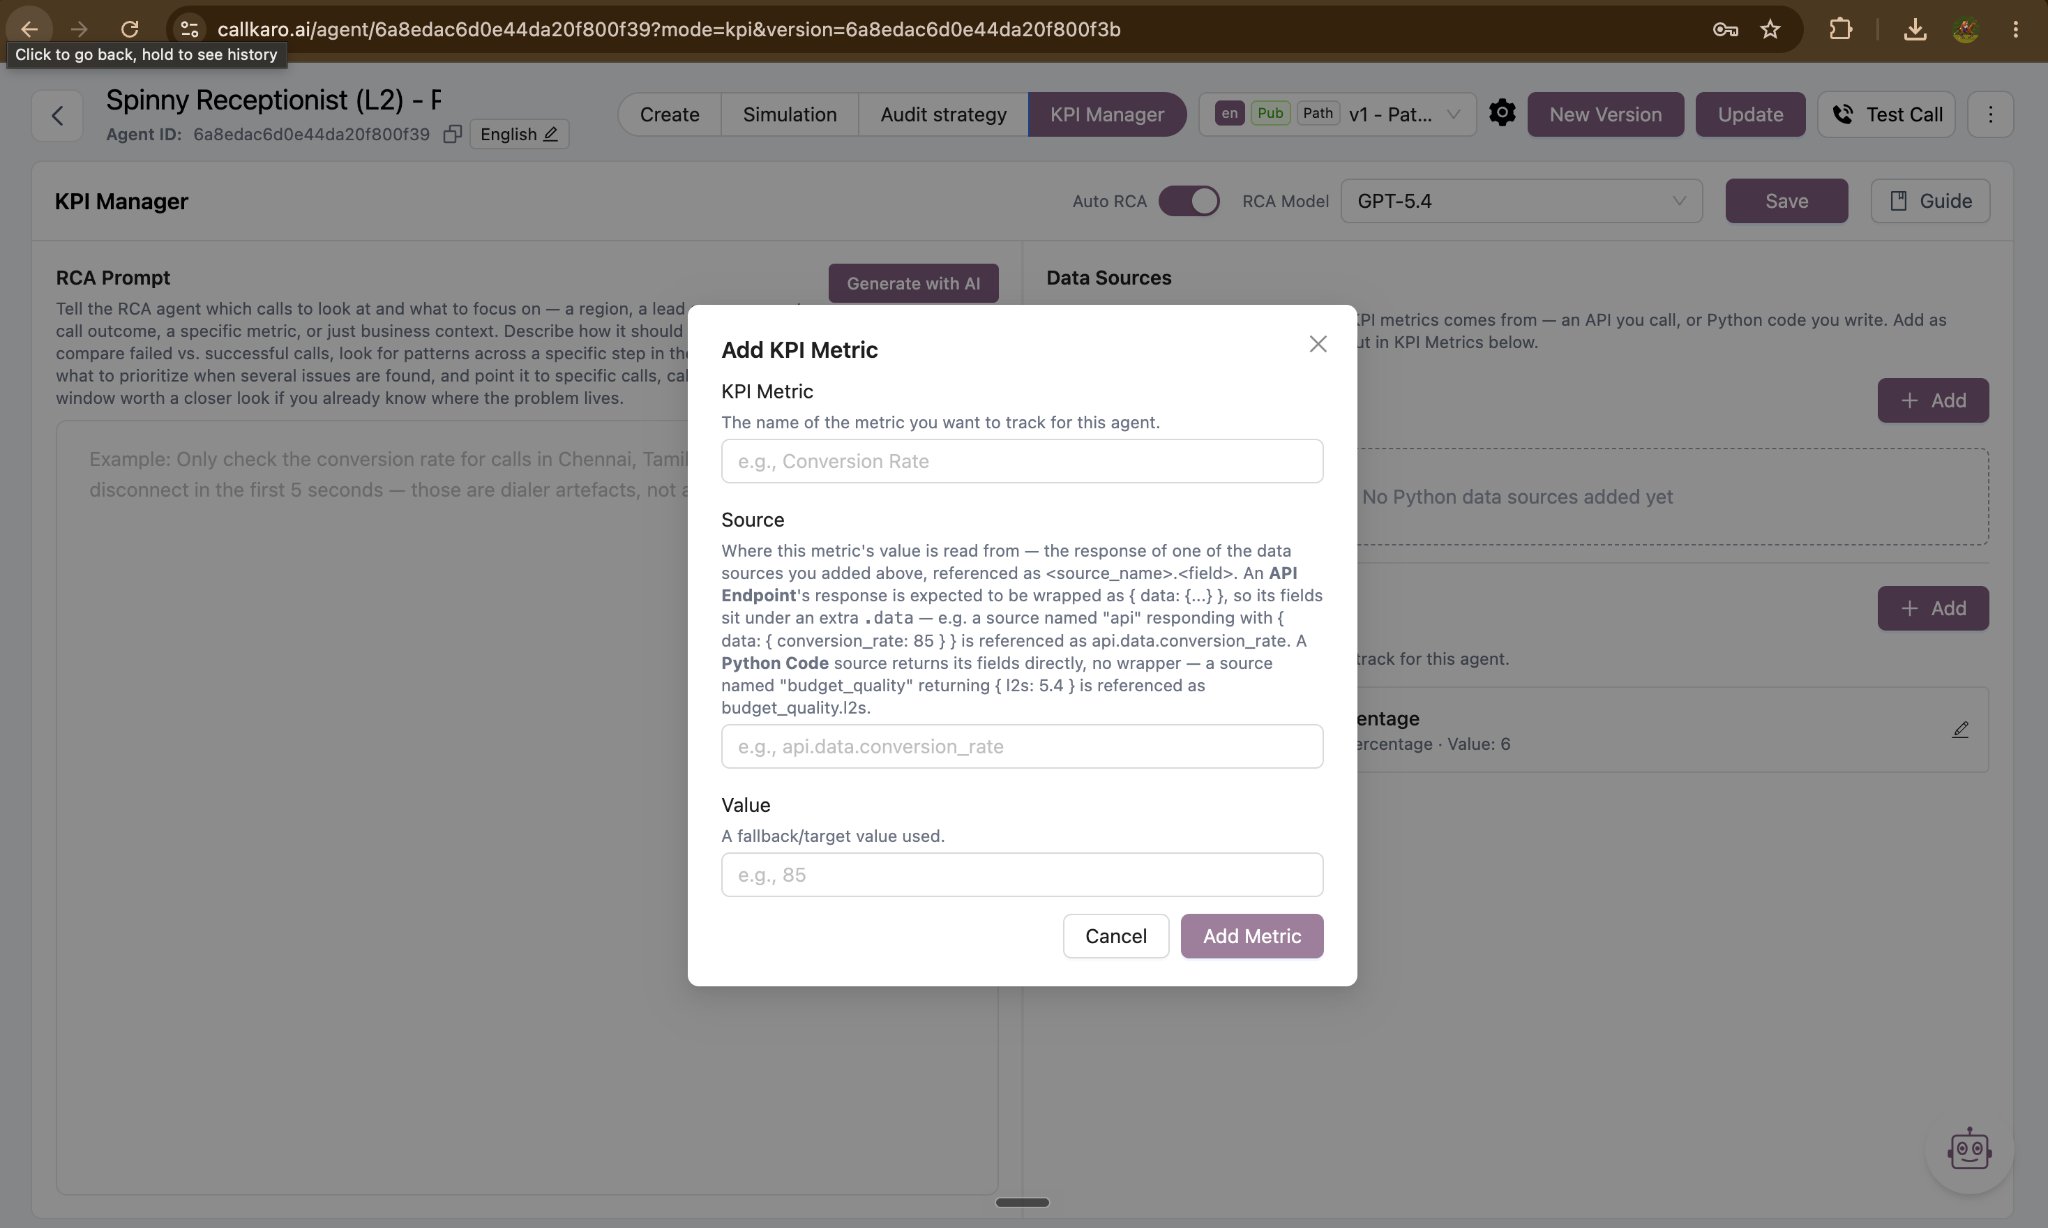
One metric is built in. Every agent starts with
connected_to_conversion_percentage — the share of connected calls that converted. Callkaro calculates it for you from platform data, so it needs no data source. Its name and source are fixed; you only set its target value.Step 3 — Write the RCA prompt
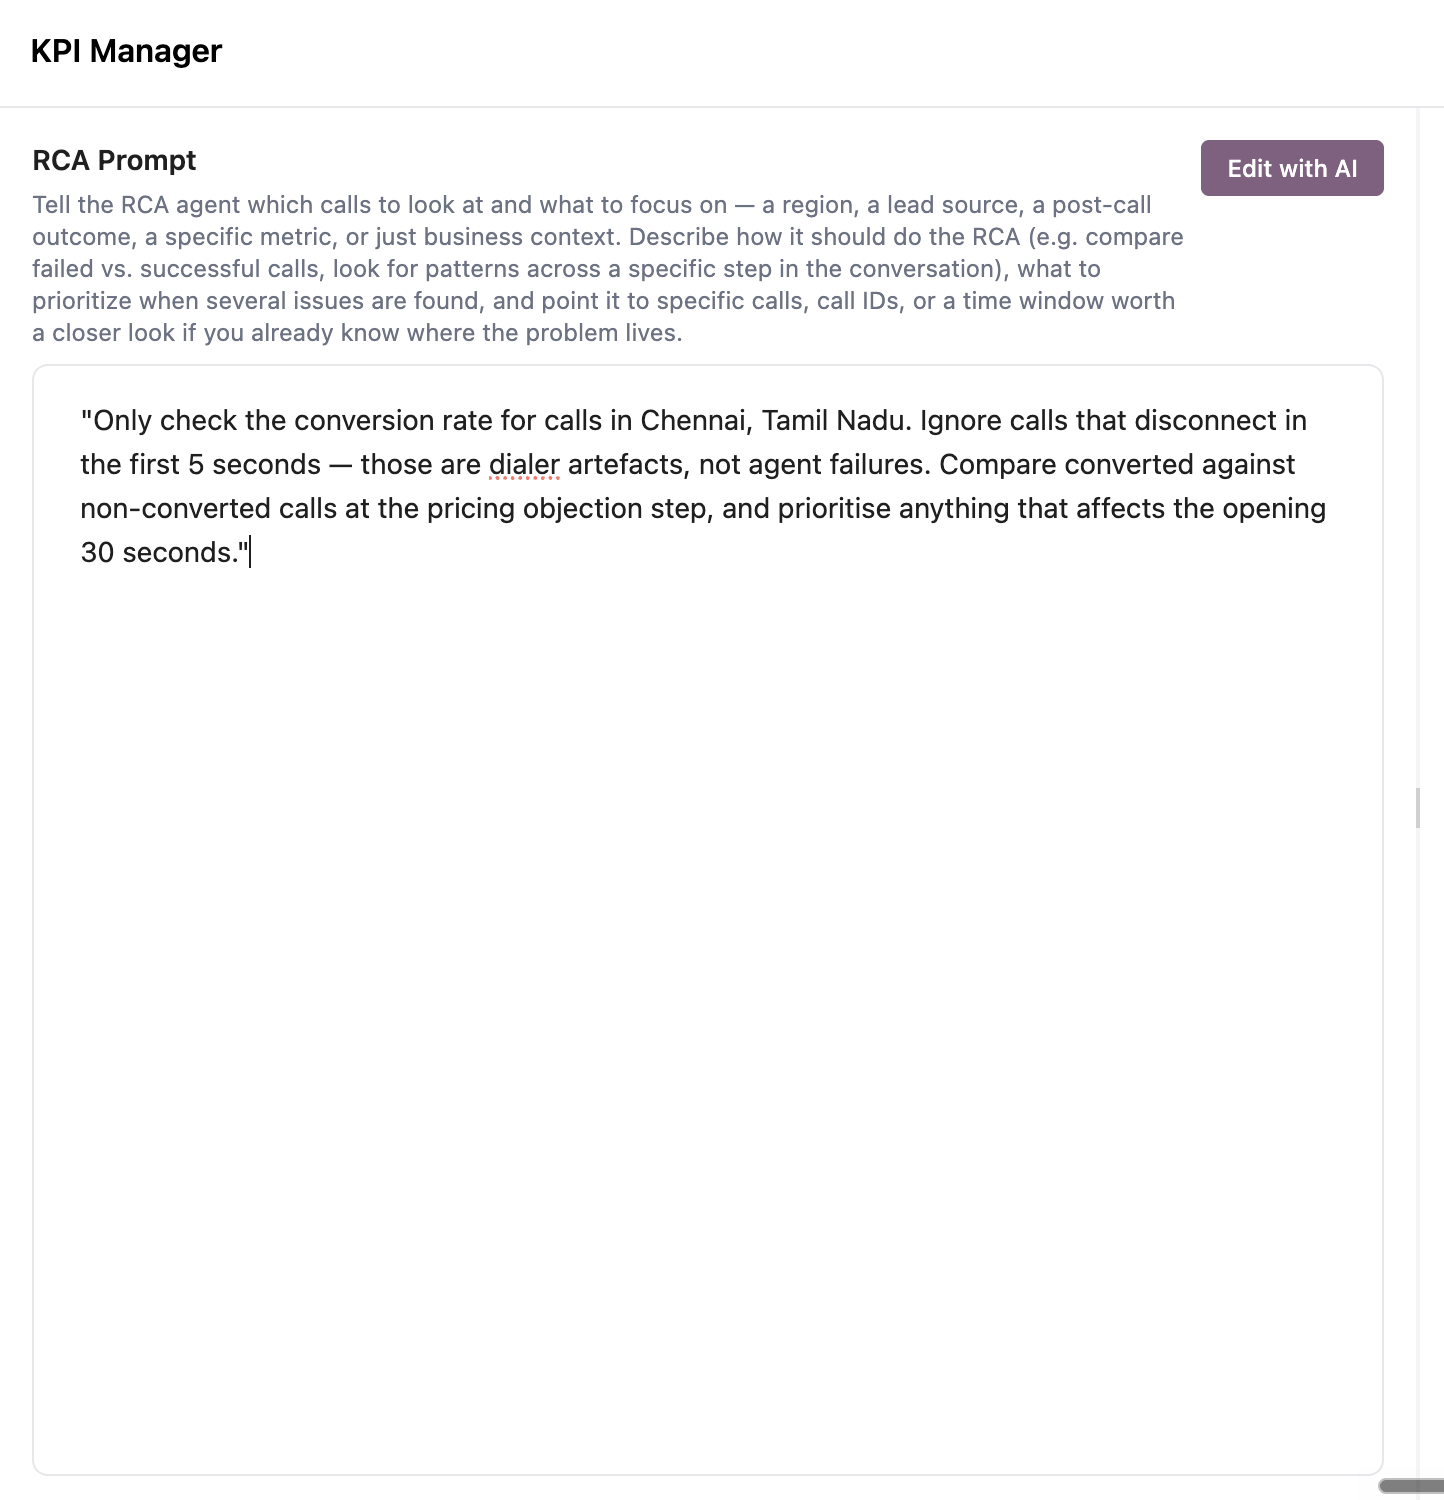
This is the single highest-leverage field in KPI Manager. It tells the analysis which calls to look at and what to care about. It occupies the whole left panel of the screen because it deserves the room. Use it to specify any of the following:- Scope — a region, a lead source, a campaign, a post-call outcome, or a specific metric.
- Exclusions — call patterns that are artefacts rather than agent failures.
- Method — how to analyse, for example comparing failed against successful calls, or examining one step of the conversation.
- Priority — what matters most when several issues surface.
- Leads — specific calls, call IDs or time windows, when you already suspect where the problem is.
- Business context — anything about your business the analysis could not infer from the data.
Step 4 — Choose the model and the automation setting
Both controls sit in the header bar at the top of the screen.